This article helps you understand how you can automatically deploy your code to AWS EC2 from GitHub using GitHub Actions.
GitHub Actions
Automate, customize, and execute your software development workflows right in your repository with GitHub Actions. You can discover, create, and share actions to perform any job you’d like, including CI/CD, and combine actions in a completely customized workflow.
AWS EC2
Amazon Elastic Compute Cloud (Amazon EC2) offers the broadest and deepest compute platform, with over 475 instances and choice of the latest processor, storage, networking, operating system, and purchase model to help you best match the needs of your workload. We are the first major cloud provider that supports Intel, AMD, and Arm processors, the only cloud with on-demand EC2 Mac instances, and the only cloud with 400 Gbps Ethernet networking.
How to automatically Deploy to AWS EC2 using GitHub Actions
Creating your first workflow
- Create a
.github/workflowsdirectory in your repository on GitHub if this directory does not already exist. - In the
.github/workflowsdirectory, create a file namedgithub-actions-ec2.yml.
Now your github-actions-ec2.yml should be present in .github/workflows/github-actions-ec2.yml in your repository
Start your file by defining jobs, jobs are the steps that you can define and see individual status reports when you see the logs in your Actions tab
jobs:
  deploy:
    name: Deploy to EC2
    runs-on: ubuntu-latest
In the above block we have defined our job with name Deploy to EC2 and enforced it to run on latest Ubuntu by runs-on: ubuntu-latest line
Now, we need to checkout the pushed code to the runner by using a predefined action named actions/checkout@v2. The code responsible for this step should look like the following
steps:
  - name: Checkout the files
    uses: actions/checkout@v2
Now, we are deploying the code to the server, in order to to do this we need to access the EC2 using ssh and perform rsync form the runner. For this we are going to use another GitHub action easingthemes/ssh-deploy
- name: Deploy to Server 1
  uses: easingthemes/ssh-deploy@main
  env:
    SSH_PRIVATE_KEY: ${ { secrets.EC2_SSH_KEY }}
    REMOTE_HOST: ${ { secrets.HOST_DNS }}
    REMOTE_USER: ${ { secrets.USERNAME }}
    TARGET: ${ { secrets.TARGET_DIR }}
Note: You need to put the double parentheses together; I had to leave a space because my code formatter refuses to print it (:facepalm)
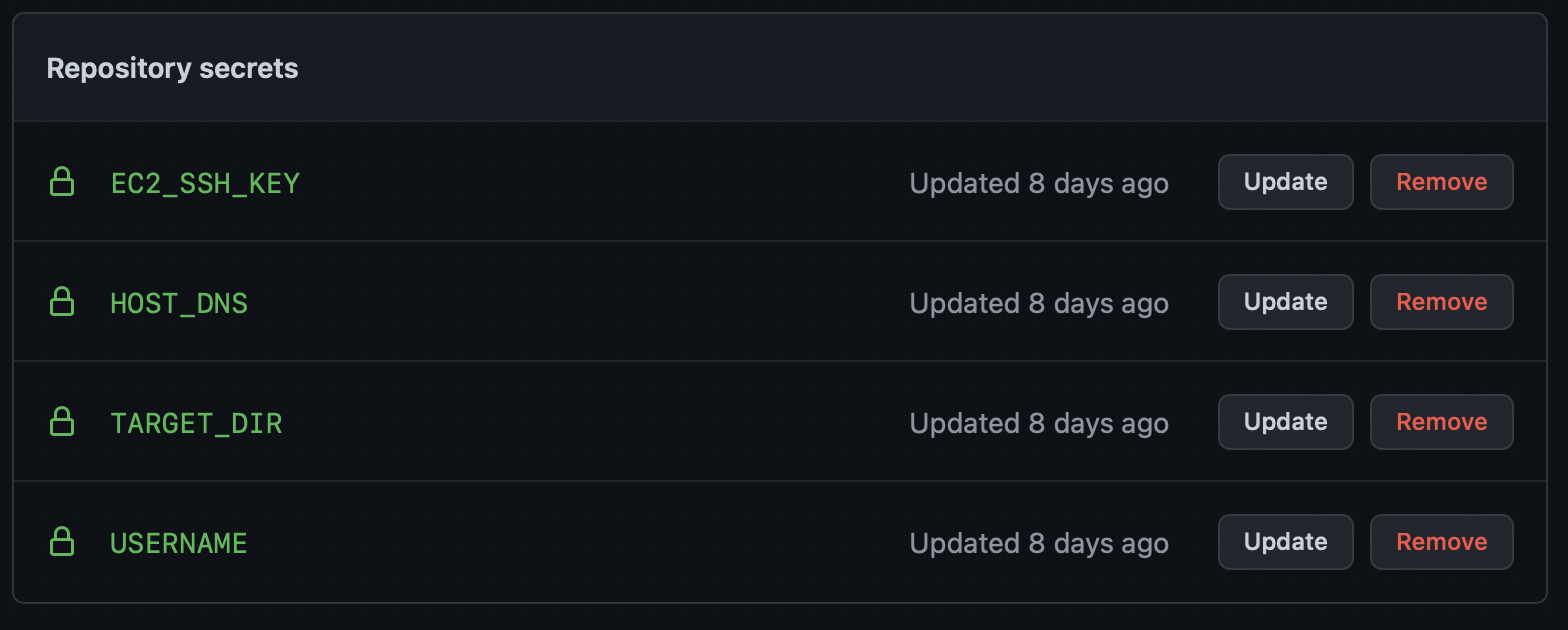
You need to fill in the secrets using GitHub Secrets that you can add in your repo, read GitHub Secrets
- EC2_SSH_KEY: This will be your
.pemfile which you will use to login to the instance - HOST_DNS: Public DNS record of the instance, it will look something like this
ec2-xx-xxx-xxx-xxx.us-west-2.compute.amazonaws.com - USERNAME: Will be the username of the EC2 instance, usually
ubuntu - TARGET_DIR: Is where you want to deploy your code.
Once you add all these information your repo will look like this

Trigger deployment only on push to master branch
Add the following code so that your actions only run when you push to master branch.
on:
  push:
    branches:
      - master
The final .github/workflows/github-actions-ec2.yml should looks like the following
name: Push-to-EC2

# Trigger deployment only on push to master branch
on:
  push:
    branches:
      - master

jobs:
  deploy:
    name: Deploy to EC2 on master branch push
    runs-on: ubuntu-latest

    steps:
      - name: Checkout the files
        uses: actions/checkout@v2

      - name: Deploy to Server 1
        uses: easingthemes/ssh-deploy@main
        env:
          SSH_PRIVATE_KEY: ${{ secrets.EC2_SSH_KEY }}
          REMOTE_HOST: ${{ secrets.HOST_DNS }}
          REMOTE_USER: ${{ secrets.USERNAME }}
          TARGET: ${{ secrets.TARGET_DIR }}
Stay tuned if you want to know how to execute custom ssh commands after you deploy the code in the EC2 instance. For eg yarn install
Here is how to Deploy React app to AWS EC2 using GitHub Actions
This article originally appeared on lightrains.com
Leave a comment
To make a comment, please send an e-mail using the button below. Your e-mail address won't be shared and will be deleted from our records after the comment is published. If you don't want your real name to be credited alongside your comment, please specify the name you would like to use. If you would like your name to link to a specific URL, please share that as well. Thank you.
Comment via email


