How to Create API Documentation with Insomnia Documenter
API documentation are instructions about how to use and integrate with an API. They are basically just a manual containing all the information required to work with the API. The information includes endpoints, request structure, response structure etc. One of the most commonly used way of API documentation is by using Swagger. But there are other ways to do so.
Why API Documentation Matters for Delivery Quality
For product engineering teams, clear API documentation is not just a nice-to-have it’s critical for:
- Faster onboarding: New developers can integrate without endless clarifying questions.
- Reduced rework: Clear contracts mean fewer integration bugs and misunderstandings.
- Better client relationships: External teams can consume your API independently.
- Maintainability: When APIs evolve, documentation prevents breaking changes from going unnoticed.
Our deployment workflow guides often start with proper API contracts because they affect every downstream system.
In this blog, we will create an API documentation using Insomnia Documenter which is in a human-friendly term.
Create a server
You can avoid this step if you already have a running project or you can clone this fastify-boilerplate
First we can create a server with 5 sample API endpoints.
- SignIn
- SignUp
- View User
- Edit User
- Delete User
I am using nodejs and express for this.
If you don’t have nodejs or npm installed in your system, please install it.
1) Create a folder
mkdir sample-api2) Initialize npm
cd sample-api
npm init -y
3) Add package and create a JS file
npm i express
touch index.js
4) Add the following code to index.js
const express = require('express')

const app = express()
app.use(express.json())

app.listen(process.env.PORT || 3000, () => {
  console.log('Server Running in Port 3000')
})

app.post('/signUp', (req, res) => {
  console.log(req.body)
  res.send({ message: 'signUp Route', data: req.body })
})
app.post('/signIn', (req, res) => {
  console.log(req.body)
  res.send({ message: 'SignIn Route', data: req.body })
})
app.get('/user/:id', (req, res) => {
  console.log(req.params)
  res.send({ message: 'User Display Route', data: req.params })
})
app.put('/user', (req, res) => {
  console.log(req.body)
  res.send({ message: 'User Update Route', data: req.body })
})
app.delete('/user', (req, res) => {
  console.log(req.body)
  res.send({ message: 'User Delete Route', data: req.body })
})
5) Start the server
node index.jsYou can see the message Server Running in Port 3000 in the terminal
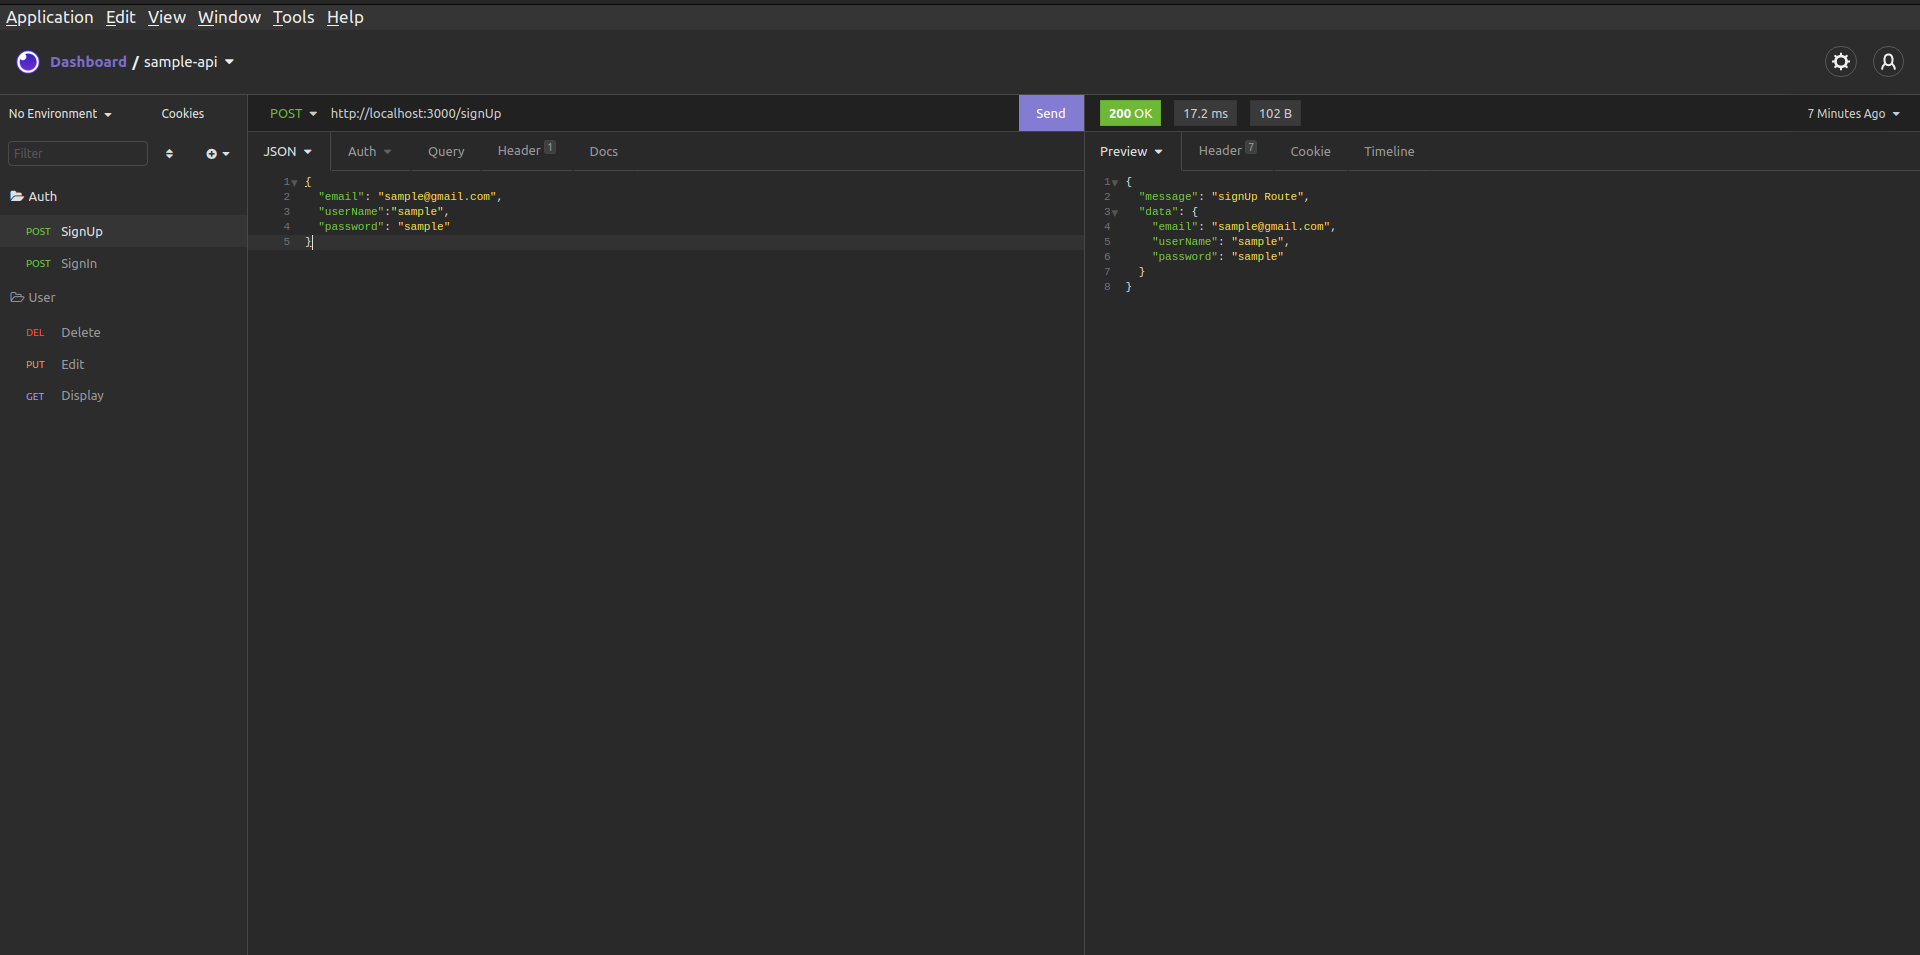
Test with insomnia
Now into the real stuff.
-
First we need to download and install insomnia.
-
Open insomnia and create a new request collection at top right corner. We will name it
blog-insomnia-docYou can add environment variables in insomnia, but for an easy implementation lets just avoid that.
-
Create a new folder called Auth using the + icon and create 2 new post requests, inside the Auth folder.
- signUp:- http://localhost:3000/signUp
- signIn:- http://localhost:3000/signIn
-
In the same way create another folder called User using + sign and add
- Display:- http://localhost:3000/user/:id
- Edit:- http://localhost:3000/user
- Delete:- http://localhost:3000/user
-
You can add JSON body for
POST,PUTandDELETErequests as per your interest.
The final result of insomnia would be as below
Add Documentation
-
We now need to configure insomnia-documenter.
-
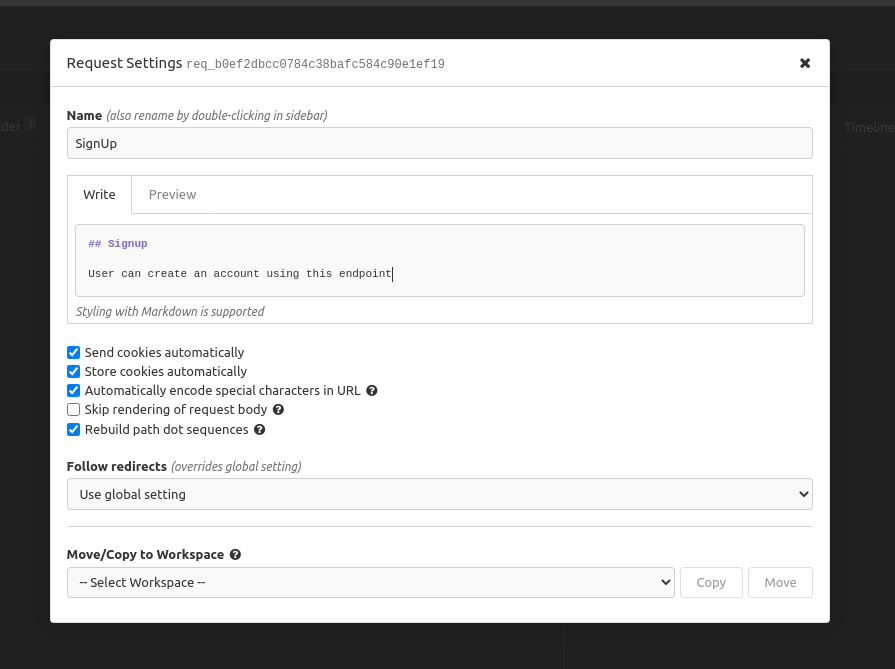
You can add description to the requests in the insomnia, which would be displayed in the documentation. We can add description by clicking on the arrow on the right side of the request tab.
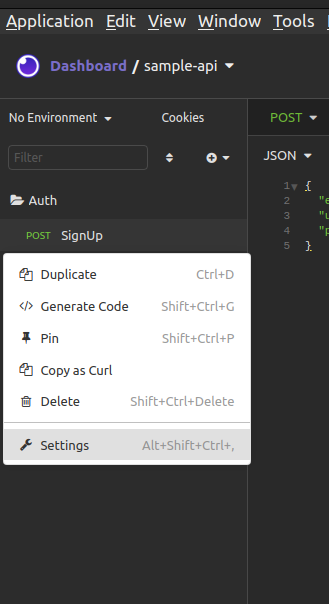
- Add description to the requests.
-
Export the Insomnia v4 (
JSON) using Import/Export…** on the Dashboard/blog-insomnia-doc- -
Open the terminal in the exported folder
-
Run the below command
npx insomnia-documenter --config filename.json --output insomnia-final-resultIf success
Getting files ready...
Adding Insomnia JSON...
* * * Done! * * *
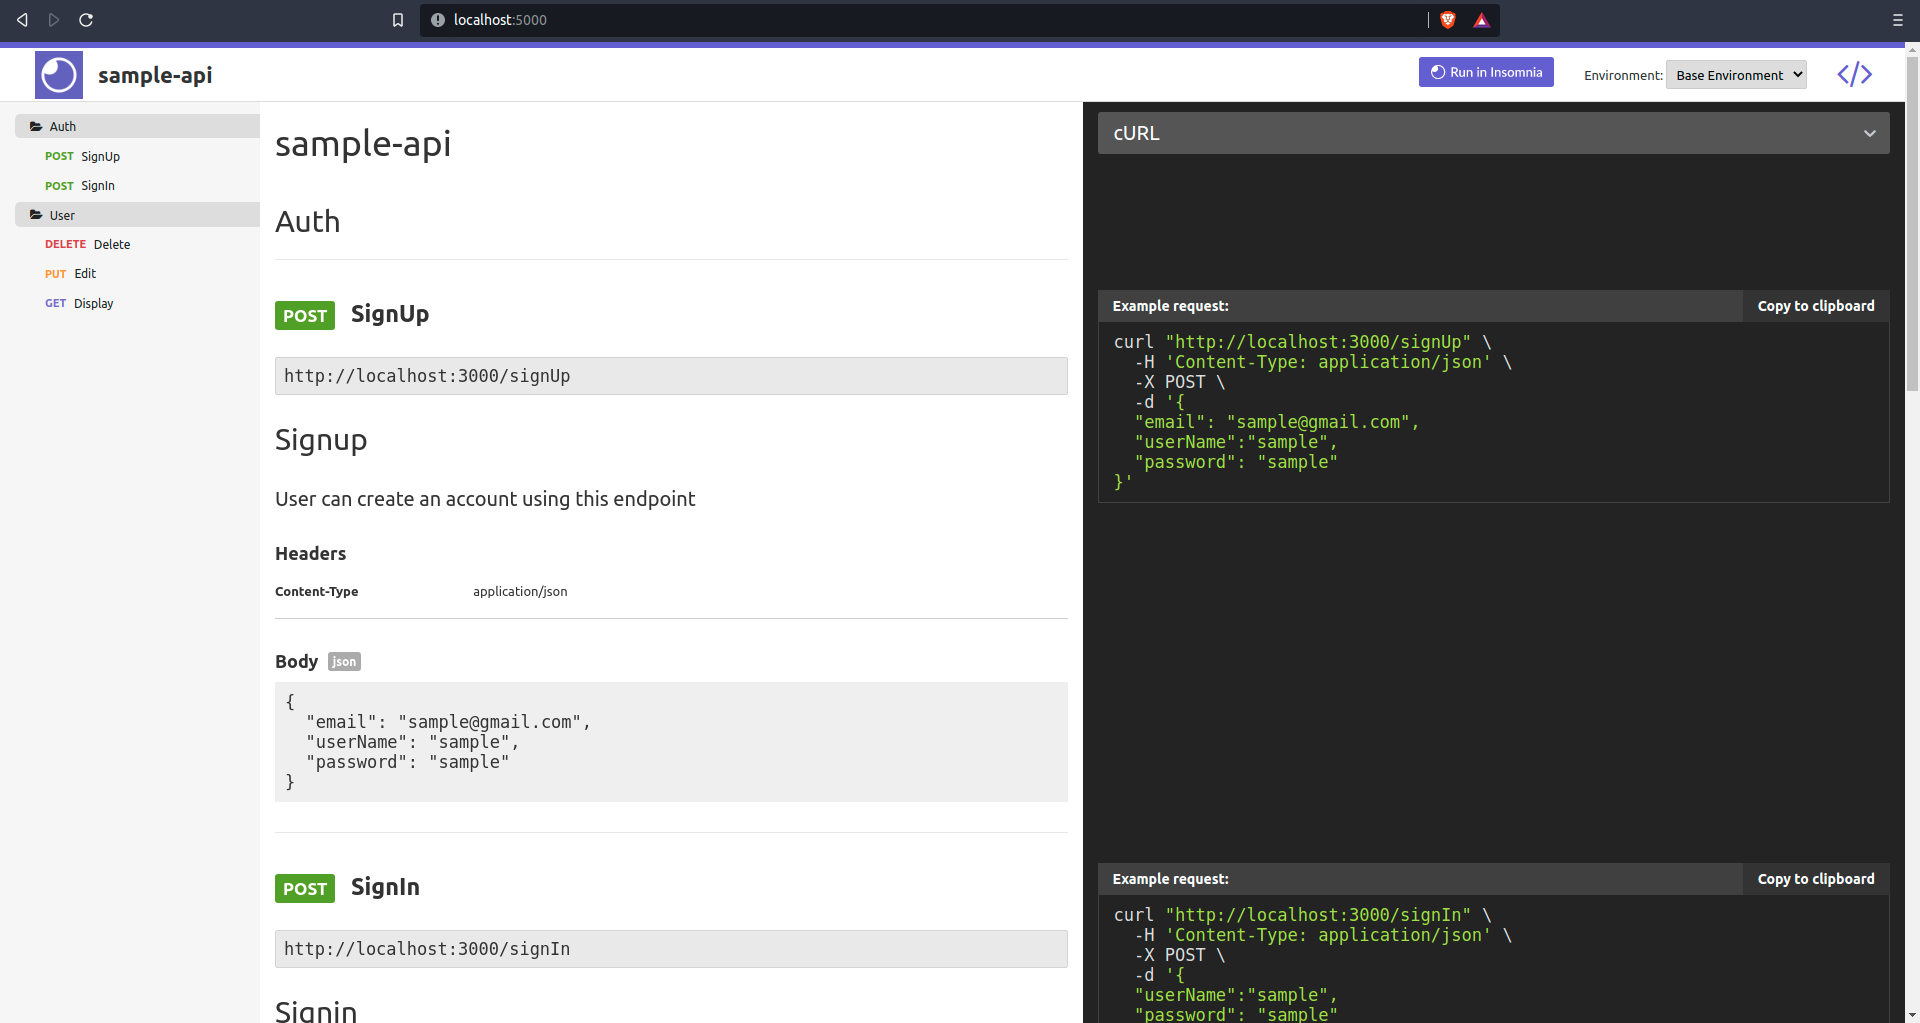
Your documentation has been created and it's ready to be deployed!View Documentation Locally
cd insomnia-final-result
npx serve
This will create a server running in http://localhost:5000 or any other port depending on your system.
- Open a browser and hit the url.
Need help building robust APIs and documentation?
Our product engineering team specializes in building well-documented APIs that scale. Whether you’re modernizing legacy systems or building new web application architecture, we can help ensure your APIs are clear, maintainable, and developer-friendly.
Talk to our product engineering services team to discuss your API strategy.
This article originally appeared on lightrains.com
Leave a comment
To make a comment, please send an e-mail using the button below. Your e-mail address won't be shared and will be deleted from our records after the comment is published. If you don't want your real name to be credited alongside your comment, please specify the name you would like to use. If you would like your name to link to a specific URL, please share that as well. Thank you.
Comment via email